
The production of biochar is simple – and a sustainable way to remove CO₂ from the atmosphere. An important component of biochar production is the vessel used to pyrolyze biomass. Generally, it is a sealed vessel usually made of metal or clay and equipped with a firebox, ventilation device and flue.
The choice of the appropriate vessel depends on several factors, such as the type of biomass to be processed, the desired quality and quantity of the biochar, and the available resources. Metal vessels tend to be more expensive, but are more effective in terms of energy efficiency and can provide a higher yield of biochar. Clay kilns, on the other hand, are generally less expensive but less efficient and have a limited life span.
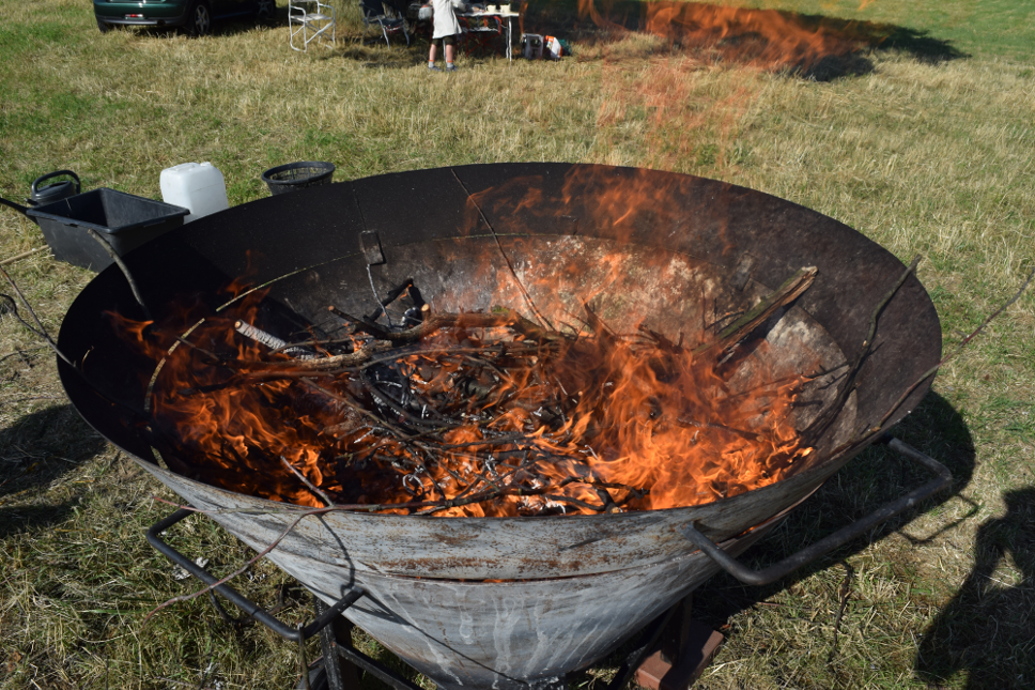
In the following step-by-step instructions for making biochar, we use what is called a kiln. The kiln works on the principle of "dry distillation" of biomass. In this process, the biomass is heated in a vessel, and the volatile compounds released are used as fuel to sustain the fire. The carbon is retained in the form of biochar and can later be used as a carbon sink in the soil.
First of all, it is necessary to select which biomass is to be used for the production of the vegetable carbon. We recommend using mainly old branches, for example from fruit trees. In most cases, some wood accumulates during the pruning of trees, which can be conveniently reused for the production of biochar, rather than being thrown away. It is important that the biomass is dry before starting the process.

Depending on the surface on which the Kiln is placed, it is advantageous to keep the surroundings around the Kiln wet. If the Kiln is very full, it can happen that burnt pieces of wood fall onto the lawn. Therefore, it may be helpful to moisten the ground beforehand.

A few small branches and paper can be used in a heat-resistant container to start the fire. If starting the fire proves difficult, ecological kindling can also be used.

After firing up properly, biomass can now be added little by little. It is important to start slowly and gradually add more and more wood. After adding wood, it is also important to wait until a light white layer of ash has formed. Only then can biomass be added again.

After each layer, further biomass can be added. It is very important to let enough of the biomass burn off.
When all the biomass has burned, the fire can be extinguished with plenty of water. Very helpful here is the use of watering cans or buckets. The process of extinguishing the fire is very important, otherwise it will not produce biochar, but unusable ash.
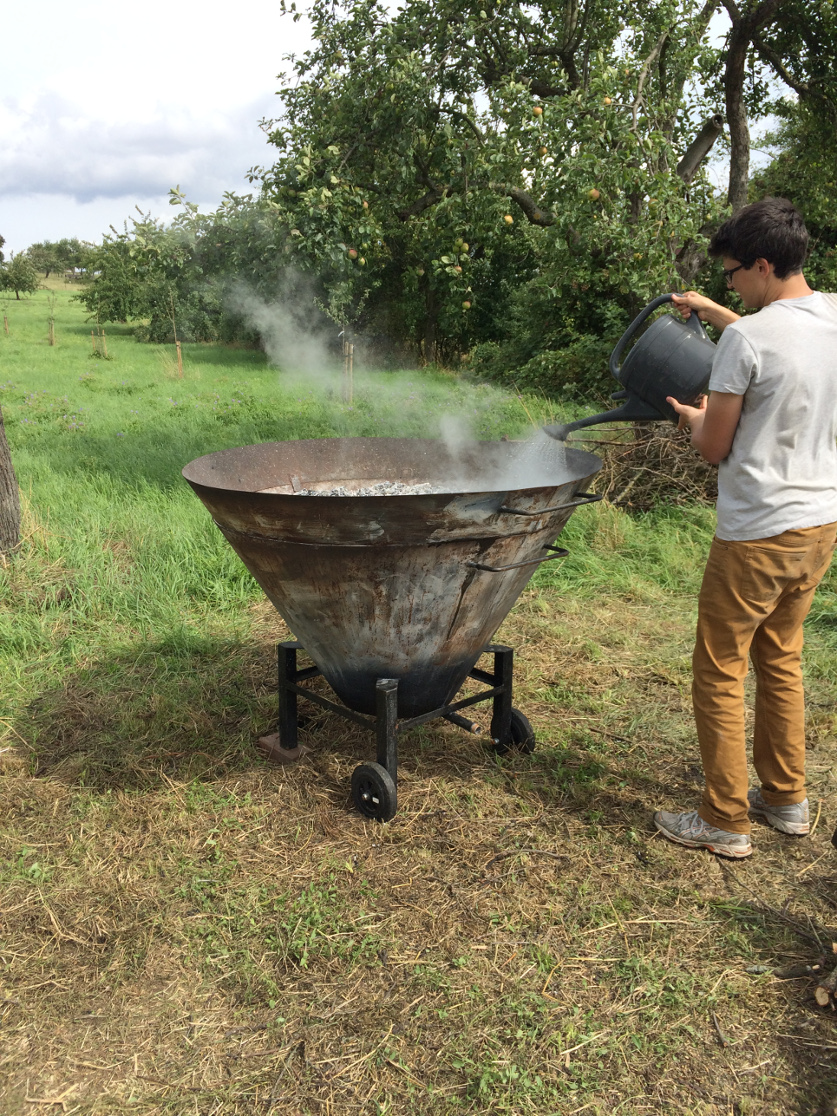
Depending on how the tank is constructed, the resulting leachate can be easily collected and used for watering plants.

Before the freshly made biochar is used further, it should cool down well.

After the newly obtained biochar has cooled down, it can be used as a soil conditioner. Before that, however, it should be "activated". Composting or fermentation can serve to activate the biochar.
